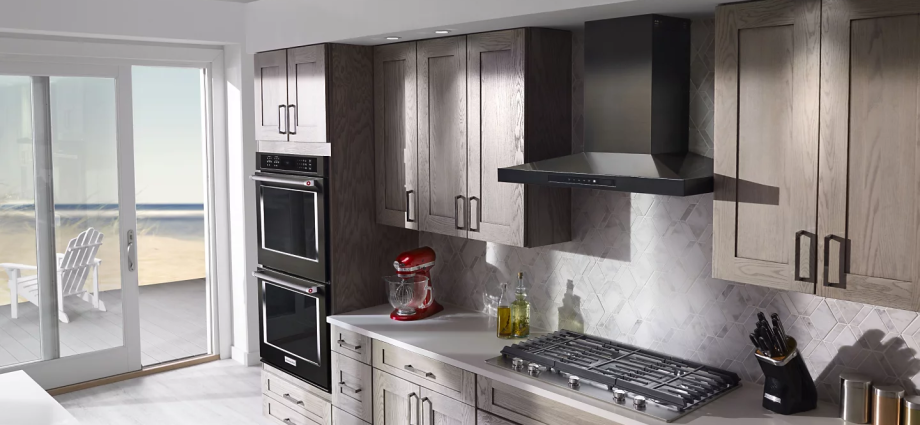
While the scent of a delicious meal can be mouthwatering and enjoyable as you cook, lingering smoke and odors in the rest of your home can be less than desirable. A range hood can help keep smoke, grease and odors out of your home, and you can install a new one with the right tools and help. This guide will walk you through some tips and tricks on how to install a range hood, so you can continuously create in a fresh space. What Is a Range Hood? A range hood is an essential kitchen appliance designed to remove odors, smoke, and grease from the air while you cook. Typically installed above ranges or cooktops, range hoods feature an integrated fan to help clear the air above your cooking surface. You might also hear range hoods referred to as vent hoods or kitchen hoods. They come in a variety of types and sizes to keep your kitchen air clear as you prepare your favorite recipes. Consider options like ducted range hoods, which vent air outside through ducts, or ductless range hoods, which filter and recirculate air back into the kitchen. Range hoods are available in several styles, including wall-mounted options, island hoods, under-cabinet hoods, and microwave combination models. When choosing a new range hood, you’ll encounter two main types: vented and ventless. Vented range hoods expel air directly outside, while ventless hoods use filters to recirculate clean air back into your kitchen. The best range hood for your kitchen depends on various factors. This guide to the different types of range hoods can help you choose the right one and ensure you know the proper installation height above your stove. What to Consider Before Installing a Range Hood When shopping for a new range hood, consider factors such as power, lighting, venting, and configuration to find the perfect fit for your kitchen. Power: The type of stovetop you have—gas or electric—will influence the kind of range hood you need. Gas stovetops typically require a range hood with a higher CFM (cubic feet per minute) rating compared to electric ranges. The CFM rating indicates how much air your ventilation system can move per minute. Configuration and pairing: Ensure the size of your range hood matches your cooking surface for optimal performance and the right fit. Lighting: Some models include lighting options to illuminate your cooking area. Venting: Be sure to check local and state regulations for venting requirements, and consider the recommended maximum vent length for best results. If your home cannot accommodate outdoor ventilation, you may need to opt for a recirculating hood. Vent Hood Installation Instructions Before installing your range hood, please note that this guide provides a general overview of the installation process. Always refer to your owner’s manual for specific instructions and requirements. This installation should be done by two people. If you are not experienced with electrical wiring or this type of installation, it is strongly recommended to hire an electrician. Supplies Needed Caps Wire connectors Metal ducts Wall mount range Building wire Weatherproof caulking compound Tools Required Level Drill with 1 1/4″, 3/8″, and 5/16″ drill bits Wire stripper or utility knife Tape measure Pliers Caulking gun Vent clamps Jigsaw or keyhole saw Flat-blade screwdriver Metal snips Phillips screwdriver Metric hex key set Step 1: Shut Off Power and Disconnect Wiring Turn off the switch at the breaker box that supplies power to the range hood. Then, unplug the range hood and disconnect all electrical wiring. Step 2: Remove Old Range Hood With the assistance of another person, unscrew the support screws while they support the weight of the range hood. Step 3: Locate and Mark Vent Location Determine the vent location based on the measurements of your range hood. If a paper template was provided, tape it to the wall to use as a reference for marking the new vent location. Step 4: Check Wall Where Vent Will Be Installed Ensure there is no plumbing or electrical wiring behind the wall where the vent will be located. Start by cutting a small hole to check for any potential obstructions. If you encounter any plumbing or wiring, consult a professional, as you might need to vent through the roof. Note: If you are installing a vented range hood above a kitchen island, the vent will need to go through the ceiling and roof. This process is different and may require professional installation. Step 5: Cut Interior Hole of the Vent If, after checking through the small hole, you don’t find any plumbing or wiring, you can proceed to cut a larger hole for your vent. Using a jigsaw or keyhole saw, cut a hole that is at least six inches wide, or slightly larger if you need more room to work. Next, use a long drill bit to place locator holes at the edges of the vent hole, extending to the exterior of the home. Step 6: Cut Exterior Vent Pipe Hole Using the locator holes as reference points, connect each dot with a pencil to form the circle for the cut. Use a jigsaw to cut out the hole. If the exterior of your home is paneled, use a piece of PVC trim to create an even surface for cutting. Step 7: Attach the Duct/Range Hood Vent Cap Insert the vent cap into the exterior opening, ensuring it is long enough to reach the range hood. Secure it with screws and seal it tightly using a caulk gun and weatherproof caulking compound. Step 8: Prepare the Damper If your vent hood includes a damper, measure it against the interior hole to determine the required space for the duct. Use a small piece of duct to ensure correct measurements before cutting the larger piece. Step 9: Run Electrical Wiring Run the electrical wiring from the hood to the electrical box. Drill holes next to each side of the vent if needed to facilitate wiring. Ensure there is enough conduit and wire from the breaker to the hood’s electrical terminal box. Step 10: Position New Range Hood and Secure Mounting Screws With the assistance of a second person, position the mounting screws through the hood’s mounting slots. Remove the grease filter for better access to the screws when tightening. Level the hood first, then tighten the upper screws before securing the bottom ones. Step 11: Finish Electrical Connection Strip the wires and connect them with wire connectors, clipping any excess wiring. Match the wire colors to the corresponding connectors and connect the copper ground wire to the grounding wire connector. Step 12: Install Vent Covers After connecting the wiring, turn the power back on at the breaker box to test the hood’s functionality. Install the vent covers following the specific instructions in your owner’s manual. Your installation is now complete! Can I Install a Range Hood Myself? Installing a range hood yourself is feasible if you have the necessary supplies, comprehensive installation instructions for your specific model, and feel comfortable with home improvement projects. However, if the installation involves rewiring, drilling through the roof, or adjusting plumbing, it’s advisable to hire a professional. Do Range Hoods Have to Be Vented Outside? Range hoods offer the option of either venting outside or recirculating air back into the home. Your choice depends on your kitchen layout and personal preferences. Vented hoods exhaust air from your home, while ventless hoods effectively recirculate filtered air as you cook. Do You Need a Vent Hood for an Electric Stove? Regardless of stove type—gas or electric—cooking releases particles like grease, food, water, and smoke into the air. It’s recommended to have a vent hood in place to efficiently remove these particles and maintain air quality in your kitchen. Do You Need an Electrician to Install a Range Hood? If you have experience with home renovation projects and electrical wiring, you may be able to install the range hood yourself. However, if you lack familiarity with electrical work or feel uncomfortable with this type of installation, it’s advisable to hire an electrician. Are Range Hoods Plugged in or Hard-Wired? While hardwiring your range hood is the preferred method, if your hood includes a three-pronged plug, it technically does not require hardwiring and can be plugged into an outlet. Can Range Hoods Be Vented Through the Wall? Both wall-mounted and under-cabinet range hoods can be vented through the wall, provided there is a pathway to the exterior of the home. When venting through an interior wall, it’s recommended to limit the duct run to no more than two elbows and ensure the length does not exceed 30 inches. Shelby Lambdin 2023-08-12